
One of my favorite techniques on the sewing machine is machine embroidery free-motion of course or free-motion quilting. In my opinion the technique is the same you just do a lot more stitching with embroidery. I like to combine the two depending on the project I'm working on.
For this particular project, I will work from a photo. I knew what I wanted so it was just a matter of acquiring some prompts to help me create a scene or in this case, a still life. I managed to find what I needed - a small vase and some silk roses.
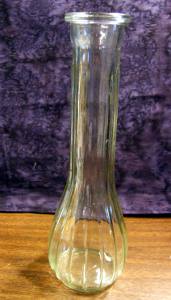
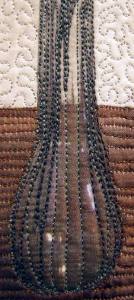
First I needed a vase
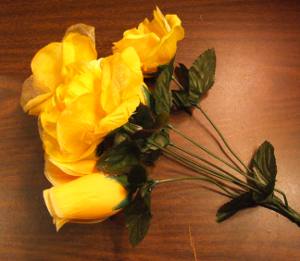
... and yellow roses for the vase
With these at hand, I began thinking of how I should display them. My first thought was a single rose in the vase with a bud but unfortunately there were no buds on my bunch of flowers. I could try pulling one flower apart to form a bud but I wasn't so sure that would work successfully so put that idea aside as a backup plan. Rethinking, I felt I couldn't use any less than three roses as I know two flowers in a group doesn't look balanced and I didn't want more than three as it would be too top heavy for the vase - so three it ended up to be.
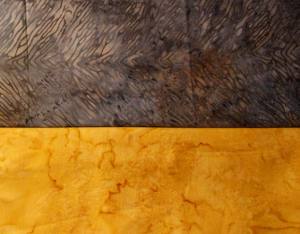
Next I needed to think about the background, an all important part of the display - a dark colored fabric perhaps...
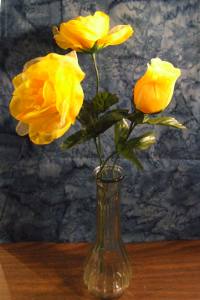
A setting with dark background
Or another thought - let's go light.
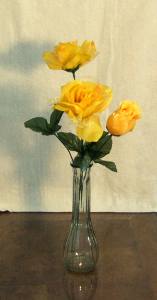
A change to a light background
Once I had the right setting, it was a matter of taking a photo for me to work with. I went ahead and printed the photo onto fabric. I've done this plenty of times before so not a difficult task. In fact, I have even written an e-book with lots of information about printing on fabric. (This goes into depth, explaining about the right sort of photo required for printing, how to prepare your fabric, printing pitfalls, many tips and tricks to use successfully, and gives you a fun project to try too.... and no, you don't need those expensive fabric sheets.)
With my printed fabric it was now time to select the thread colors and begin stitching. This is the fun bit - so much in fact that I forgot to take the photo prior to stitching! I pulled several yellow threads ranging from very light to dark gold, a couple of greens for the leaves, grey-greens for the vase, and lastly two more threads for the background. I picked mostly rayon threads for the foreground elements to create a shiny effect to give the impression that the light was reflecting off them.

My selections of machine embroidery threads
So with my threads selected, I layered the quilt top with batting and backing and then began stitching. I started with the roses. I ended up using five threads in total for the roses starting with the darkest thread first and working through to the lightest which added the highlights.

Stitching using 5 shades of yellow
Now onto the leaves and vase. Not too much stitching on the latter. I didn't want to lose the transparency effect of the glass vase.
Less stitching on the vase
And lastly the background. The wooden table was enhanced by a few wood knots and the light top was stippled quite fine.
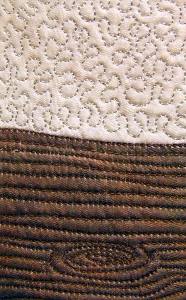
Stitching wood knots and stippling
With all the stitching complete it was time to find some fabric to border this. I couldn't believe I found the perfect fabrics in my stash without much effort. The gold/yellow was just the right color for a 1/4" border and the batik grey as outer border would finish it off nicely as it pulled the colors from the table top, the vase, and the grey stipple in the background.
Fabrics I found in my stash
I finished off by adding an almost black binding.
I made this project for a friend's birthday so it made the process even more enjoyable, but not as much as the appreciative look on his face as he opened my gift. Give someone a gift that you've made and you'll know exactly what I mean.

Yellow rose quilt finished
This technique is something I teach in my Printing on Fabric workshop - I have an entire lesson dedicated to it. I also teach a Still Life workshop that would certainly enhance your creative arrangements. If you are interested in either, follow the links to find out more information or drop me a line and I'll get back to you.


