As a continuation of fusible web, I need to talk a little about stitching techniques. (see here on how to prepare your applique) You can use almost any stitch but probably the most common are satin stitch, blanket stitch and free-motion stitching. Satin stitch is a very closed up zigzag. It is quite a heavy look and one I do not use any longer. It also uses a lot of thread. I prefer blanket stitch or free-motion.
Most of the blanket stitch default settings on your sewing machine are quite wide so the first thing I do is shortened the width and length of the stitch. Practice on a scrap of fabric so you can see just how it looks before working on your project. For small detailed applique, I make the stitches small, for larger applique I will make large stitches so I test each time I'm about to begin. As a guide, the bite of the stitch should be the same length as the distance between each bite. The bite of the stitch is the stitch that goes into the fabric.

The bite going into the applique shape
For this project I have select a stitch width about 1/8" wide.
When stitching, the outline stitches should be just off the edge of the applique shape being stitched, with the bite going into the applique shapes.

Stitch right along the edge of the shape
At the corners you should pivot with the bite of the stitch going along the line of symmetry. Tip: if your machine goes backwards and forwards when doing blanket stitch, you should always pivot after the stitch has been taken forward.

Pivot at the corners
It's time to stitch those petals! Stitch from the center out and only along the raw edges. Edges that are covered by another shape do not need to be stitched.

Petals are stitched
With gentle curves you can guide your fabric around as you stitch however, if the curve is too tight, you will need to pivot. Tip: it is better to pivot often so the bite stays perpendicular to the edge of the applique shape.
Now you can stitch the center. I used a slightly darker thread for this as I wanted to outline it. Be aware that the darker thread with enchance any mistake.

Center is stitched
My blanket stitch flower is complete. It was a little tricky getting around the sharp points of this flower. Sometimes I needed to lengthen my stitch so the pivoting point was right at the tip. To do this, I just gentle pushed the fabric through the machine. When I need to shorten it, I gently pull on the fabric to prevent it going through as fast. This means you do not have to alter the stitch length. Notice, some of the bites on this fine point will overlap a little.

Closeup on point
My very favorite stitch with fusible web is free-motion. I love this because for me it is much easier to do. There is not pivoting of fabric nor twisting and turning which can be rather hard when working on a large quilt. Also, because I stitch through all the layers, it leaves the back looking much neater than blanket stitch. The drawback for many however, is that it is much more difficult to control the stitching. You do need a lot of practice before you work on your project. I find warming up before starting is a great idea.
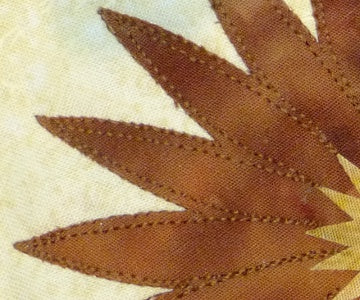
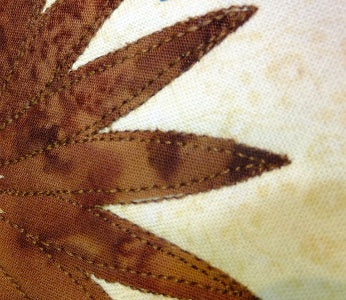
I have stitched my brown flower using free-motion. I stitch along all the raw edges just like is done with blanket stitch. With free-motion, I can extend the stitching line right into the center to define each petal. You couldn't do this as easily with blanket stitch.
I started at the center section and stitched down the petal edge out to the point and then back to the center, all the way around, stitching close to the edge. I stitch about 1/16" from the edge.

free-motion petals
When that's complete, I stitch again right near the edge or just off it. No need to stitch into the center this time.

free-motion petals
I did the same with the center, this time using a lighter thread to give more highlight to it.

highlighted center stitching
That was quick and easy.

Which style do you like best?
There is an article I wrote some time ago giving tips about free-motion stitching that you may find interesting. You can find it here: Tips for Free-Motion Applique


