
How to make an applique daisy using fusible webbing - preparing the applique shapes.
One of the easiest methods of applique is fusible webbing applique. This method of applique is quick to make with very pleasing results and you can stitch it in place using several different methods.
To begin with, let's take a look at what you will need for my applique daisy block:
- A selection of fabrics for the design - I recommend cotton for best results
- Templates - see our link below for the templates used in this lesson
- Cutting and drawing tools
- Ironing board/mat and iron
- Teflon sheet, baking paper or parchment paper
- Fusible Webbing
- Threads, sewing machine and batting to finish your project (not required in this first lesson)

Requirements needed to make daisy applique
Take a look at your template sheets first. If you missed the download, sign up for our newsletter here and we will automatically send them to you: Free Daisy The first page is the whole design as it will look when it is completed. This is the right side of the pattern.

Whole design template - right side
On the second template sheet you will see individual pieces. Each piece will be cut out separately. They are all reversed ready for drawing onto your fusible webbing. (if you do not reverse the templates for fusible webbing, your project will end up back to front).

Individual templates - reversed
All the solid lines are the cutting lines. The dash lines (hard to make out in the photo) are where another section, numbered higher than itself, lays over it. The dash line is where the raw edge of the top piece will be.
Next you need to select your fabrics. I selected yellow fabrics in different shades, two greens and a black for the center. You can see I am only going to need a small amount of each to make this applique. You will also need a background fabric to attach your applique daisy too.
Now let's look at fusible webbing. Have you used this before? I like the light fusible that is easy to stitch through. I have written an article you might like to read before starting this project: What is fusible webbing >>
So now that you know how to use fusible webbing, draw the individual pieces from template sheet 2 onto the paper side of the fusible. Cut these apart, not on the line, just in between each section.

Draw templates on paper side of fusible webbing
Press each section onto the WRONG side of the appropriate fabric.

Press fusible webbing to the WRONG side of fabric
Now it is time to cut them out along the solid line.
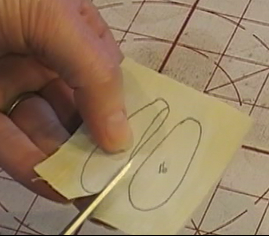
Cut out each section along solid line
Here are all my individual sections cut out ready to press together.

All sections are cut out - 19 in total
I have included a video for you of this first part so you can see it first hand.
The great thing about fusible webbing applique is that you can build the applique shape up on your teflon sheet first, rather than directly onto the fabric background. This gives you the ability to see if anything is wrong before it is made permanent.
Start by placing the teflon sheet over your main template (the one that is facing the right way). You can see the template right through the teflon sheet.
Begin adding the sections, one at a time. First the two leaves and then the stem, remembering to remove the backing paper as you work and pressing them ever so lightly onto the teflon sheet.

Add the two leaves and stem
Now work on the flower head adding each piece in numeric order until all pieces are added.

Section 1 is the first petal

Several petals now in place

All sections pressed in place on the teflon sheet

Gently peel it off the teflon sheet when all pieces are in place

Holding the applique daisy in my hand
I have a video showing how this all comes together. Check it out!
Remember you can find the templates for this design here: Free Daisy Download
"How to Stitch Applique" is up next. You can find the instructions here: Applique Stitching


