
Anita kindly reminded me about the need to start Christmas gifts (and my grandchildren seem to already be mentioning it too!) so Anita and I put our heads together for a little brainstorming to come up with some ideas for quick and easy gifts. My plan over the next few weeks is to offer you a series of ideas (with tutorials) so you can get started too. It will be fun creating together! It's certainly a good time to consider starting some projects for the upcoming holidays.
Many of us are choosing to not go out in public places any more than absolutely necessary so time to explore our stash and see what we can make. All the upcoming projects should only take small amounts of fabric.
One of Anita's small project Christmas gift favorites is potholders.

Star Pot Holder
There are a number of easy blocks that make lovely potholders with layers of scrap cotton (not poly!) batting and a bit of binding. Anita says, "For thicker batting such as Warm and Natural, I would use 2 layers. For lighter batting such as Quilter’s Dream Light, I would use 3 layers of batting". Of course, if you have thermal batting that restricts heat flow, you can use that too but most of us don't have that on hand!

A block from Joy Table Runner
You can have potholders for any everyday use or for various holidays. Most any 8" block works well, or if you are looking for Christmas blocks some of Anita’s single block patterns are available.


For the binding, I personally like to use my fold over backing method which I'll explain below. Anita uses a standard binding, adding a little extra to create a tab at one corner. "I make a continuous binding and just extend it past the edge then fold the extra back to make a loop. Sometimes I use a plastic loop instead of a fabric loop, but usually, I just make the fabric loop. Sometimes the fabric loops are straight and sometimes I tilt them. It just depends on the moment."

Tabs on Anita's potholders
Fold Over Backing Binding Method
I used last week's Christmas block for this demo, however, it was only a 6-1/2" block (unfinished) which is a tad small so I added a 1" border around it (cutting strips 1-1/2" wide) to make it up to an 8" finished block.
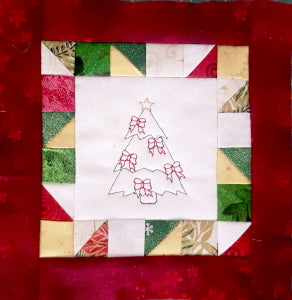
My Christmas Block with border
I made a tab: 5" long from a 1-1/2" wide strip. The long edges were pressed over...

long raw edges are folded over to the wrong side
and then the strip was folded in half longways so the raw edges were enclosed. I then stitched the edges together.

Tab stitched
I added a couple of layers of batting - each cut at 8-1/2" to match the block and I cut a backing fabric 1-1/2" large than the block, so the backing ended up as a 10" square for this block.
With the backing face down, I layered the batting on first, then the block right side up on top and in the center of the backing. It's a good idea to trim off the corners - but not too much!

Corners trimmed on the diagonal
Next, I rolled over the backing, folding under 1/4" as I went (including the corners to create miters) to cover the raw edges of the block. Pinning in place is a good idea! Note: you could easily use square fold overs at the corners too, either work.

Corner folded with miter
Place the tab at one corner, poking the ends under the rolled over backing.

Tab tucked under binding
The ends should be square on so when you fold the tab up they sit together as you see here:
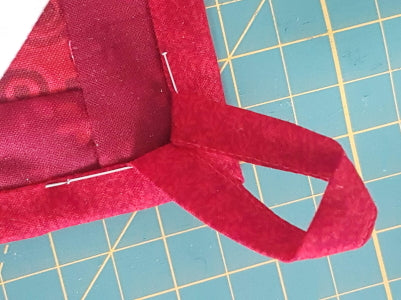
Tab folded up
Now all you need to do is stitch around the folded edge then push the tab up and stitch it in place.
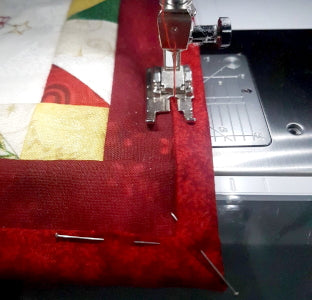
Stitching down the folded binding
With a good press, the corners should sit in place nicely otherwise add a few stitches by hand or machine to hold the miter together.

My finished potholder
Potholders that match a table runner can be fun if you have leftover fabric! Check out some of our table runners here: Browse our Table runners


