Doing It Your Way
Drafting Your Own Patterns & Making Your Own Templates
A tutorial written by Carol Miller for Quilt U

A 5-patch block drawn on a grid
To make your own templates, the first thing you need is accurate graph paper. Betty Boyink Publishing makes paper specifically for quilters and you can often find it in quilt shops or at shows. The art section of office supply stores will also carry graph paper, either 4 squares to the inch or 8 squares to the inch. Graph paper made for school arithmetic is not accurate for drafting.
Obviously, you can draft a much larger quilt on 8 squares to the inch and you can break it down into smaller increments. However, I started with 4 square paper and between the force of habit and the age of my eyes, I have stuck with it.
If possible, you want to get paper that has the inch lines marked with a slightly darker line so you will not have to mark off the inches yourself.
Most of the time, I am interested only in drafting my own size block. I know that I will be able to rotary cut the units, because I am lazy and that is how I like to work. Sometimes, I actually have to make templates.
For templates, I purchase a thin plastic sheet, slightly thicker than an index card. This can be cut with regular scissors. There is a new, heavier product made for templates. This type will require a special cutting tool.
You can draft patterns in any size you choose. It is much easier, however, if you pick a size which is compatible with the block you are drafting. For example, a 4-patch block would work best in any size which divides by 4, such as 4, 8, 12, or 16. A 9-patch block works best with numbers that divide by 3 such as 3, 6, 9, 12, 15. Notice that 12 can be used with both 4-patch and 9-patch blocks. That makes it a good candidate for sampler blocks. This same formula holds true for any geometric blocks.
Note: The trick is to determine what type of block you are working with. In many block books or patterns, the author will obligingly tell you. Sometimes, you will see a block in a quilt and there are no guidelines. Then you will have to look at the block and see its underlying skeleton - the grid on which it is drawn.
Your graph paper can accommodate any block up to the size of the paper. If you have 8 1/2" x 11" graph paper and want to draft a 12" block, you will need to carefully tape FOUR pieces together. That can be a pain. If your block is symmetrical, you could just draw one quarter of it full size and make your templates from that. The entire block could be drawn to scale.
In a scale drawing, you assign a value to each square on the graph paper. One square equals one inch is easy to remember. That allows you to draw out whole quilt layouts without making them full size.
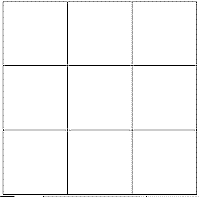
Okay, suppose you want to draw out a 6" Friendship Star? You mark off the 6" square on your graph paper. This is the outside of your block. The Friendship Star is a standard 9-patch. That means a tic-tac-toe grid can be drawn first. It divides your 6" square into 9 equal pieces.
6 divided by 3 = 2. The lines will be drawn every 2"
Now all you have to do is draw the diagonal lines in the middle outside blocks to make the star.

Friendship Star drawn on 9-patch grid
Look what happens if you try to draw the 9-patch on some other grid. In this example, the space was drawn for an 8" square. Now none of the 9-patch lines match the inch lines. It CAN be done, but unless there is a compelling reason, why would you?

9-Patch drawn on 8" grid - not a good match!
If your block is more complex than a Friendship Star, just continue to add whatever lines are needed.
Preparing for Templates - Adding the Seam Allowance
Once your block diagram is drawn, you can figure out which pieces require templates. In our Friendship Star block, we know that the original grid divided the space evenly. That means the plain square blocks are 2". You do not have to figure this out. You just count the inch blocks on your graph paper. A square does not need a template for rotary cutting. Just add 1/2" for the seam allowance (1/4" on each side) and cut your squares the size indicated by your graph paper drawing.
Suppose you would like to have a template for your half square triangle. I would redraw this half square triangle onto a clean piece of graph paper, exactly the same size. You can then use your ruler to add a 1/4" margin on all sides of the piece as shown in the drawing below.

As you can see, the seam lines on the right angle side of your piece fall right over the lines on your graph paper. The seam allowance on the diagonal line has no reference on the graph paper. All of the lines should be drawn so that they extend out from each corner and cross the next seam allowance line.

I use this clear flexible ruler with graph paper markings on it. They match the markings on paper which is 4 squares to the inch. It allows me to draw seam allowance lines on paper or fabric without having the ruler cast a shadow and distort my measurements. It is available in the sewing section of most chain stores.
If you use this ruler and measure the 1/4" at the right angle corner, you will see that even though you have drawn lines that are exactly 1/4" out from each of the straight sides, the diagonal distance from the point of the piece to the point of the seam allowance is 3/8"! This is one of those mathematical truths that you do not have to understand. You simply have to know that it is so and be consistent.
So, now that you KNOW the distance between the end of the piece and the point where the seam allowance lines cross is 3/8" (3 little grids on the ruler), draw the same crosswise line at all three corners as I have in the picture.
Your template will now have accurate corners and will not contain long "ears" that stick out and eventually have to be trimmed to reduce bulk. In a half square triangle, the excess is minimal. Look what happens in a triangle with acute angles. You might run into this with Mariner's Compass pieces.

If your block is more complex than the Friendship Star, you will take a slightly different approach. I draw the block twice, once to keep and once to cut up. It is important to have a good drawing of the entire block to use as a check for your work. Label each unit of the block.
Cut your block apart EXACTLY on the lines between the sections. Use a glue stick and paste each piece down on another piece of graph paper. Draw the seam allowance lines around the pieces as described above.
Note: If you are a hand piecer, you must decide whether you want your templates to include the seam allowance or not. If the template includes the seam allowance, you must then mark the stitching line on each piece. This would be marked on the WRONG side of the fabric. If it does not, you can either mark the cutting line OR cut by eye, knowing that your stitching line is already marked.
Making the Templates - Pieced or Appliquéd
Note: Appliqué templates do not contain the seam allowance.
Once your piece is drawn correctly and includes the seam allowance, you are ready to make templates. If you have grouped your templates on pieces of graph paper, keeping them as close together as possible while still allowing cutting room between them, you can now use a glue stick and attach the entire piece of graph paper to your plastic template material. If your templates are on separate pieces or scraps of graph paper, each one will have to be glued to plastic backing.
As you glue, be certain to apply the stick around the edges of each unit so that they will stay firmly in place.
Glue sticks are terrific since they do not bleed through and will not leave lumps or wet splotches.
Your pieces will now be cut out EXACTLY on the outer seam allowance lines. If you have a used rotary blade, it is excellent for this purpose. If not, use scissors.
If you are planning to rotary cut:
- You may also glue this to cardboard to provide a thicker edge to cut against
- You may use the new, heavy duty template plastic. This requires a special cutting tool
- You may put the template under your rotary ruler as a guide and use the ruler's edge to cut
- You may draw the lines around the piece with a pencil, then use your rotary ruler to cut the piece
Note: If you are marking on the wrong side of fabric, you can use any kind of pencil. Pens are not recommended as the ink can run when wet. If you are marking on the RIGHT side of fabric, do NOT use a YELLOW marker. This will NOT wash out.
Label each piece to correspond to letters on your original graph. Include the block name and the size block it will make. I like to apply sandpaper circles to the back side to keep the template from slipping on the fabric. Templates should be stored in plastic bags, one block for each bag.
by Carol Miller (Quilt U)


