
- Description
- Requirements
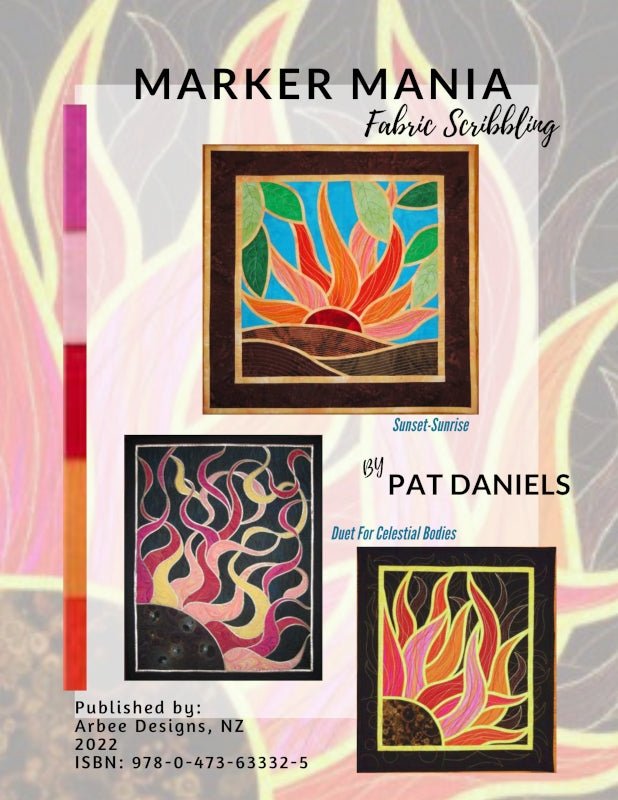
Marker Mania introduces the use of all sorts of fabric and paper markers to produce a little stained glass quilt called ‘Sunrise-Sunset’ or a slightly more ambitious one called 'Duet For Celestial Bodies'. You will work with all sorts of fabric markers to create the flames for either of these quilts. And you can learn about making your own bias tape.
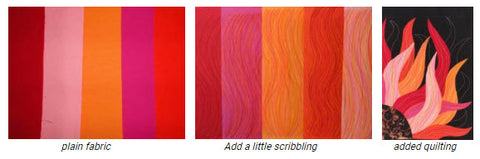
As an alternative to the usual fabric choices, you can hark back to your crayon days (or maybe get your kids to help with this step) as you draw with fabric markers to colour your own, unique fabric. No artistic flare is necessary. This is playtime. You will be able to add a little bling to your quilt as you learn about metallic threads of all sorts (bobbin threads included), when and where to use them, and how to avoid breaking them as you sew. There is no piecing. To assemble the quilt, you will work with fusible web, bias tape, and machine quilting. This ebook is about options. You chose the method that suits you best. We are talking serious fun here.
- Video included
- No piecing required
- Scribbling on purpose
- Using Bleach Pens
- Working with bobbin and metallic threads
Sound like fun? It is, so join Pat today and get started.
For all levels of expertise!
Pat has a whole bunch of goodies worked into this ebook – this is not just another stained glass project. And since there is often more than one way to do anything, you can visit a potpourri of options that will provide many skills to bring to other projects.
OUTLINE
Part One
In this part we will:
- assemble either the Duet pattern or the Sunrise pattern
- print the pattern
- trim the pattern
- align and connect the tiled pattern pieces
- cut the background fabric (sky fabric for Sunrise quilt)
- transfer the pattern onto the background fabric, using one of four methods:
- transfer paper and a tracing wheel
- tracing paper and machine basting
- a light table and a white fabric marking pencil
- a bright window and a white fabric marking pencil
- prepare the flame fabrics (if not using commercial prints), using felt tipped markers
- (for Duet only) prepare the moon piece (if not using a commercial print) by discharge-dyeing, then neutralize the bleaching action, using one of two methods
- hydrogen peroxide
- Anti-Chlor
Part Two
- make paper templates and stencils
- make flames (and moon for the Duet quilt) (and leaves and land for the Sunrise quilt)
- audition the fabric placements
- trace the patterns onto the fabrics
- cut out the pieces
- secure pieces to the background using one of the following:
- fusible web
- water-soluble liquid glue
- temporary fabric adhesive spray
- use threadwork to decorate
- types of thread, spools, and needles
- where to stitch
- bobbin work (optional)
- use extra fine tip pen to add moon or leaf and land details
Part Three
- make fusible bias tape, using
- 1/4" bias tape maker or
- 1/4" bias bar
- use the bias tape to create the stained glass leading
- add the inner and outer borders
- assemble the quilt sandwich, using one of three methods:
- temporary fabric adhesive spray
- safety pins
- needle and thread
- quilt the wall hanging
- make and attach the hanging sleeve and the binding
Fabrics
For Duet For Celestial Bodies quilt:
- Flames: a fat quarter of a solid colour each of the following:
- Red
- Dark pink
- Light pink
- Dark orange
- Light orange
- Black fabric: 2 yards (for the moon, background, border, backing, binding and hanging pocket)
- Yellow fabric: fat quarter (for bias tape and border that can be lightly textured or solid fabric)
- Batting: 23" by 26"
For Sunrise-Sunset quilt:
- Flames: a fat quarter of a solid colour each of the following:
- Light pink
- Dark orange
- Light orange
- Greens: fat eighths for leaves (use at least 3 different colours of green for 7 leaves)
- Browns: fat eighths for earth (3 different colours of brown)
- Sky fabric fat quarter (for the background in light blue)
- Scrap of red (for the sun)
- Dark fabric: (I used the darkest brown) 1/2 yard border, backing, and hanging pocket
- Yellow: fat quarter (for bias tape and border that can be lightly textured or solid fabric) plus 9 inches for binding
- Batting 20" by 20"
Flame fabric option 1
Solid fabrics:
For each of the following colors, if making your own flames, you will need solid fabrics in fat eighths or even quarters to make sure you have enough fooling around space or, if you do not want to make your own fabric, use commercial fabric scraps:
- For Duet quilt: Pinks + oranges - fat quarters for flames (use at least 5 different colours for flames)
- For Sunrise quilt: Pinks + oranges - fat quarters for flames (use at least 3 different colours for 8 flames)
If decorating your own fabric flames does not appeal to you here are some other options:
Flame fabric option 2
If you do not want to make your own fabric, use hand-marbled fabrics. Marbling in this case does not refer to fabrics with a subtle texture like Moda Marbles but instead it refers to fabrics that have lots of long wavy lines.
Flame fabric option 3
Or you may be able to get commercial marbled fabrics that are pictures of hand-marbled fabrics.
Markers for flames
Felt-tipped markers and fabric pens - Try to get the kind of fabric markers that do not need heat setting, are permanent, non-bleeding and in two or three widths of fat nibs (up to 1/2"). Look for light-colored very fat marker nibs to act as blenders.
I used the following colours:
- red
- pink
- orange
- yellow
- reddish purple
These are the specific brands I used. All of these markers need no heat setting, are permanent, and non-bleeding. If you cannot get these brands, please test all of your markers.
- Tulip – big phat fabric marker (½-inch nib in pink and yellow) These inks cannot be dry cleaned.
- Y&C – FabricMate chisel tip (red and orange)
- Pébéo – SetaSkrib+ (orange and reddish purple)
- Marvy Uchida – Fabric Marker (dark pink)
- Felt-tipped markers “Fine” - I used Sharpie markers. The nibs marked ‘fine’ have a rounded nib and are okay. These markers are desirable because the colour does not run, nor do they need heat setting. Do not get the nibs marked “extra fine’.
Markers for pattern transfer and cutting lines
- white for black fabric
- light color for lighter fabrics
To transfer the pattern you will need only one of the following:
- Dress-maker’s transfer paper and a round or stippled tracing wheel
- Water-soluble tracing paper and a round tracing wheel
- If you get a chalk-based transfer paper you may need a Clover Eraser Pen
- Thin tracing paper and pencil
- Light table or sunny window and white marking pencil
Fabric Adhesive or Webbing
You will need only one of the following for attaching the flames and moon piece:
- SteamASeam2 Lite fusible web – 1 yard - If you do not use this product, your fusible web should have paper on both sides of the web. You will be marking one of the sides
- Roxanne’s Basting Glue (optional)
- 505 Temporary Fabric Adhesive spray and plenty of newspaper (This is also an option when it comes to assembling the quilt sandwich. You can either use spray adhesive, pins or basting)
- For binding - 1/4" hem tape (I use Steam-A-Seam2) – one package usually comes in a 40-foot length
Bias tape
Method 1 Home-made tape with bias tape maker
- fat quarter of bright yellow
- 1/4" bias tape maker (I used one by Clover)
- bias tape roll of fusible 1/4" web (I used Steam-A-Seam 2 1/4" tape)
Method 2 Home tape with bias bars
- fat quarter of bright yellow
- Bias bars
- Roxanne’s Basting Glue
Method 3 Commercial bias tape
- Clover Bias Tape one 11-yard roll in gold
Threads
- Neutral thread to piece borders and in making your own bias tape
- Shiny threads in gold, orange, and/or red like the following:
- metallic thread
- Sulky Sliver thread (look great but does not photograph well)
- Tri-lobal thread (photographs the best)
- Wonder Fil thread
- Invisible thread or yellow thread or to match your bias tape colour
- Bobbin threads (optional) in pink, red or golden-yellow like:
- YLI Candlelight (I used yellow and red)
- Razzle Dazzle
Note: Do not use ribbon threads unless you are prepared to couch them
- Sewer’s Aid by Prym-Dritz (optional) - to prevent metallic threads from breaking. Do not use this product with Bernina sewing machines
Other Requirements
- paper for printing downloads
- rotary cutter for both paper and fabric
- cutting mat
- 6" x 24" ruler
- large square ruler (optional)
- masking tape or painter’s tape
- cardboard about the size of a fat quarter
- sewing machine
- toilet paper tube
- round-headed or regular pins
- Quilter’s Wonder Wheel - 1/4" (optional)
- Bonash Iron Clean cloths (optional - in case you get adhesive on your iron)
- plastic sheet to protect your working surface from markers
For Duet For Celestial Bodies only
- some kind of garment to protect your clothes when working with bleach
- plastic sheet to protect your working surface from bleach
- hydrogen peroxide or Anti-chlor
- tooth brush (an old one will do)
- 1 or 2 cotton swabs
- Markers for moon fabric
- Extra Fine Sharpie marker – black (or other permanent, non-bleeding marker)
- sharp pencil
- bleach pen (Clorox Bleach Pen gel is the strongest but if you want less distinctive lines, try another brand)
- Choosing a selection results in a full page refresh.
- Opens in a new window.