
With Christmas quickly looming, (okay we do have a few months yet but it is definitely time to start thinking of our Christmas stitching and quilt making now that we're over halfway through the year!) I decided to show your my version of Anita's "Joy Christmas Banner" - definitely a fun project I had to make. Below you will find some extra tips to help you with this project and quilting in general.

Who's this pattern for?
Basically this pattern is suitable for a beginner. It has easy steps to make the letters. These letter blocks can have binding added and used as pot holders or joined together to make a horizontal banner - ideal for any beginner. The vertical banner with point as I made above, I would class for a confident to intermediate quilter as the binding can be a little tricky with the different angles.
When it comes to quilting, I decided to add more than the pattern describes but still keep it within the realm of beginner, however I did use specialty threads to add a little sparkle which in turn takes it passed the level of intermediate.
How did I quilt the Joy Banner?

I love the look of metallic thread, especially that sparkle on a Christmas project. It does take you longer because you need to slow down and not run your machine as fast as you normally would otherwise the thread will break. It's also a good idea to use a Metafil needle which is designed especially for sewing with metallic thread - a top stitching needle works too. These needles have a larger eye as you can see in the photo (regular needle of left, topstitching on right) for the thread to go through and a groove down the shaft of the needle to help prevent the thread from breaking as it pierces the fabric.
You can easily use a background quilting filler to quilt down the layers around the letters. This is what I chose to do. Normally I would stipple quilt it but this time I decided I would use an easier technique suitable for beginners - straight quilting cross-hatch. I have a couple of tricks to speed up the cross-hatch quilting technique.
- Instead of drawing all the lines on the quilt I use a strip of masking tape to sew along side. It's easy to move over and align with the row of stitching after the first row is completed.
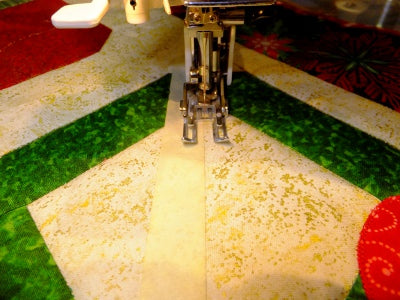
Straight quilting using masking tape guide
- I also quilt from one side of the quilt to the other even when a letter or applique is in the way that I don't want quilted. I simply jump over it by stopping at the edge, securing the threads with several very close stitches together, lifting the needle and dragging the thread over to the next starting point. You can see I've done several rows in the photo below where the threads are dragged over the green and red fabrics.

Dragging the thread across
Oh I should have mentioned that instead of doing the usual cross-hatching I made a double cross-hatch. That's two rows together (1/4" apart) instead of one. Did you notice?
Back to those threads. After I've finished quilting, I just go back and cut them all off close to the quilt top. Note: You should cut them longer and run them through to the back if you didn't secure the ends as you quilted.
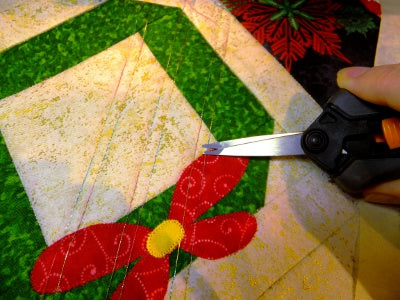
Snipping the threads off afterward
So this is what the quilt looks like with more cross-hatching completed.

One directional cross-hatching
I have done all the rows in one direction using just one strip of masking tape. Now I need to decide if I should leave it like this or do the rows in the opposite direction. What do you think? Let me know your thoughts.


