
It's school holiday time again and I'm looking forward to having my granddaughters for a sleepover. Last year Izzy (aged 6 at the time) embroidered my tortoise design using a simple running stitch for the main body and fill-in stitches for the eye and toenails. She chose all the colors and the lines to follow - she enjoyed it immensely.


Today I decided to turn it into a cushion for her and give it to her as a surprise on Thursday when she visits. Here's what I did...
After a good press, I trimmed it down to 10-1/2" square and added a 2" border. That is, I cut strips 2-1/2" wide, and from that cut two at 10-1/2" and two at 14-1/2". I added the smaller two on opposite sides first, then the longer two on the remaining sides so it looked like this.

Then I cut a flange. Since I wanted a 2" wide flange, I cut strips 4-1/2" wide so I could fold it in half instead of hemming it. Taking note of the cushion size beforehand (14-1/2" square), I cut two flange strips this length, then two more that were equal to 14-1/2" - 1/2" plus (width of strip x 2) thus 22-1/2" long. I added those in the same way as the border above.

Next comes the cushion back. You can make a non-opening one by simply cutting a back the same size as that measurement I took note of (14-1/2" square) however it gets a bit awkward to put the cushion inner in and finish off the edges so I like to make an opening through the center, tack it together with an overlap, and then cut it to the size required.
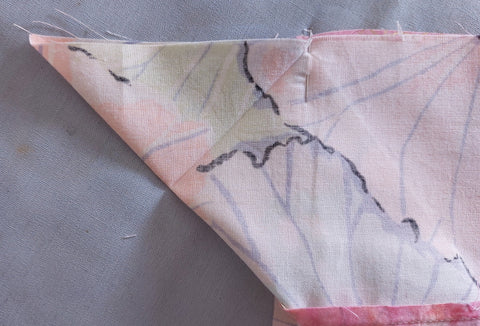
Here is mine ready to be trimmed. Notice the binding strip I added in the center, this is the overlap.

Once the backing is ready, I center it along one edge of the flange with right sides together and sew along the seam, but not into the seam allowance at each end - that's the important part. I repeat for the opposite side and press the seams outward.
Then laying the whole piece out flat and working with one of the unfinished edges, then fold the backing down at 45 degrees....

and do the same for the flange using the same degree, folding from the corner tip. A pin is required right where the seam meets (or where I stopped stitching).

From there I fold the corner tip of the flange to the other seam (where the flange is attached to the front) to form a right angle triangle.

I press the fold as that will become my seamline. Now unfold it again.
Once that is complete, I repeat for the other end. Now I'm ready to stitch. Make sure the front of the cushion is clear of the flange and backing, I start stitching at the outer edge of the fold, I sew along the fold to the inner point, across the flange/backing seam, and along the fold at the other end.

At this point, I can trim the excess seam away or leave it in for a bit of stability.
Of course, I need to repeat the above for the other side and then I'm almost finished. Just turn it inside out, do a topstitching just inside the flange on the front, and add the velco dot to hold the backing closed.... oh, must not forget to add in cushion inner..... and ta-da!


