I needed some quick easy placemats for a Christmas setting, however these can be made with any fabric for any occasion. In fact, they are reversible so the back could be used too. More about that in another post.

placemats on table
I made four placemats, two red and two gold. These are real easy to make and don't take a lot of fabric either. For each placemat I need:
Main color (in this case the red or gold rectangle on the right side) you need ONE 12" x 4 3/4" rectangle and ONE 2 1/2" square.
For the other five fabrics you need ONE 2 1/2" strip (one WOF strip will make two placemats)
You'll also need a 12" x 20" piece of batting and backing fabric. You can make these a little larger but be careful not to make it much more than 12" if you want to get two placemats from one strip.
On the batting mark in a vertical line 4 1/4" from the right edge and another shorter line coming out from the vertical line, halfway up the line (at 6" if it is cut 12"). The marked side of the batting is the top side.

Position the backing fabric under the batting (wrong side facing batting) then position the main 2 1/2" square fabric so two corner points of the square are directly on the lines. I didn't use pins, but you can if you wish.

Place your first strip (after the selvage is removed off one end) even with your square and sew your seam on the long edge of the strip to the vertical line on the batting.

Now press the strip over the seam allowance...

...then trim the strip off along the vertical line. This doesn't have to be real accurate as it will be trimmed up later.

Square off the end of the strip and then position it on the other side of the main square, raw edges even. Again, sew along the seam stopping at the vertical line.

Press the strip over the seam allowance and trim off.

Keep adding all the other strips in the same way, in your order of preference. As it grows, you'll be trimming the end of each strip even with the batting top and bottom.

When all strips have been added, align the main rectangle even with the vertical line, right sides together and stitch 1/4" from the raw edge.

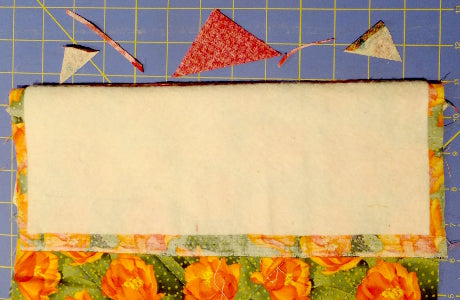
Before pressing the rectangle in place, turn your placemat over to the back. Fold the backing and batting along the vertical line or as close as you can.

Then carefully trim off the excess fabrics as close to the batting as you can, without cutting the batting.

Fold it all back in place and press the rectangle over the seam allowance.
Now trim it up. It is easy with a 6" wide ruler. Just align one side of the ruler down the middle matching up all the corner points of the strips and trim the other side.

Here is how my gold placemat looks after it is trimmed.

and here is a red one with the binding on.

I used my dark green to bind them all using the machine. Most of the time I hand stitch the back but not for table mats. I prefer the strength of machine stitching. For this I make the regular mitered binding but I attach it to the back first and then turn it over to the front and topstitch it in place. Quick and easy.


