
- Description
- Requirements
Let Nancy open up for you a new world of possibilities devoted to appliqué. She shares hints about fabric selection, fabric placement, and her stress-free techniques for needleturn appliqué so you will be able to make whatever your heart desires.
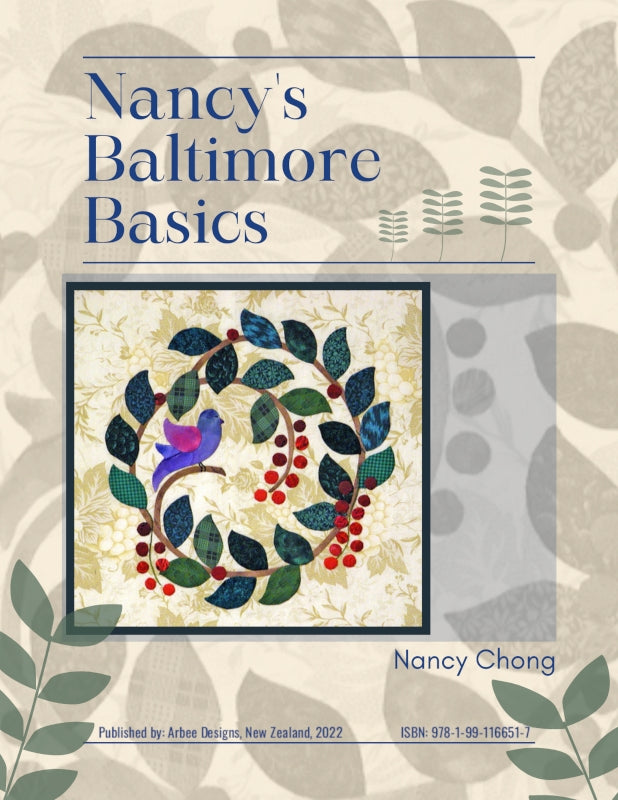
This ebook includes two blocks: a wreath with berries and a bird, and a papercut design. You can complete these as first blocks in a Baltimore Album quilt or make a table runner, pillows or a 4-block wall hanging. You will also learn a little about the history of nineteenth-century quilts.
You will also discover links to some short video clips where Nancy shows you her technique in action.
Suitable for All levels.
OUTLINE
Part One
- History and characteristics of classic, papercut, primitive and red & green quilts
- Bibliography
- Preparation of background fabric
- Preparation of appliqué fabric pieces
- Use of lining fabrics
- Methods for choosing fabrics for your quilt
- Preparation of stem fabric
Part Two
- Needle threading tricks and techniques
- Quilter’s knots
- Basic appliqué techniques
- Straight line
- Point (a mountain)
- Outside curve
- Reverse point (a valley)
- Folded fabric bird beak
- Very easy skinny stems (an alternative technique)
Part Three
- Embroidery embellishments
- Surprise technique (for future Baltimore Album quilts)
Part Four
- Papercut (scherenschnitte) style blocks – fabric preparation
- Basic appliqué techniques
- Inside curve
Part Five
- Finish options for your Baltimore blocks
- Appliquéd dogtooth border
- Batting and quilting options
Background Fabric
We will be making two blocks in this ebook. Each block will be finished at 12" x 12". For the 12" finished block size:
- cut background fabric 16" x 16" OR
- use a fat quarter and know that you can cut it down to size when the appliqué is completed
Baltimore style quilts (and those made up and down the Eastern Seaboard during the heyday of the Baltimore album quilts) were most often made using white or muslin fabric for the backgrounds. This is, however, your quilt. You can use any background fabric you want. Generally, avoid using medium-value fabric or fabric that has high-contrasting elements in the print. When you use medium-value background fabric, you restrict your choices for appliqué fabric to either very light or very dark fabrics. The medium appliqué fabrics will not show up well on that background.
If you choose a background fabric with high-contrasting elements in the print, the focus of the quilt block becomes the background print, instead of all the work you put into the appliqué design. Should you decide to use a dark background, do not feel obligated to use only solid black. Consider black-on-black, very dark navy blue, maroon, purple or green. Your quilt will have a different look than someone who chose a light background, but these choices can be absolutely stunning.
Appliqué Fabric
Wreath Block: Various scraps of fabric for your appliqué motifs. In this quilt block, we will use a brown or green for the stems, various greens for the leaves, fabric suitable for grapes or berries, and fabric for a bird. Remember that you can choose fantasy colors for each of these elements; they do not have to be realistic colors.
Beige tone-on-tone background with variety of appliqué fabrics
Papercut Block: You will need a 12" x 12" piece that will be appliquéd onto your background fabric. Choose a solid color fabric, or one that appears almost solid, for the most successful effect. If you choose a print that has a lot going on or has highly contrasting elements, the viewer is less likely to pay attention to the pattern and more to the fabric.
Pattern
In Part One, you will need to print the wreath pattern and the papercut pattern shown above. They will each finish to a 12" block (or larger, if you prefer). In Part Four, I will present the methods for preparing and sewing the folded papercut block.
Supplies
Needles:I strongly recommend you try a milliner or straw needle, size 10 or 11. Milliner and straw needles, here in the US, are two different names for the same needle. Technically, there are many types of milliner needles, all designed for sewing hats. The straw needle was designed for sewing straw hats. I think they are perfect for needleturn appliqué because they are thin and long. I will refer to the needle as a straw needle in this ebook.
I suggest a size 10 or 11 because they are thin. Thin needles are easier to use because they pierce the fibers with less effort and with less strain on your hand, wrist, elbow and shoulder. In choosing a needle, you need to be aware that the higher the needle size, the shorter and thinner that needle is. I do not recommend using any needle for hand appliqué with a size smaller than 10. I prefer a long needle because it is easier to manipulate the seam allowance when I tuck it under using the needleturn techniques you will learn in this ebook.
Some suggested brands you may find in your local fabric stores are: John James, Foxglove Cottage, Colonial Needles, Richard Hemming & Sons (labeled milliner), and Bohin (appliquér longues, not available in size 11). Outside the US you might be familiar with Milward.
Thread: The most important decision you will make in appliqué is which needle to use. The second most important decision is the thread that best matches your appliqué fabric. I always take my appliqué fabric to the store when choosing thread. I lay one strand of the thread against my fabric to make the best decision. Do not lay the entire spool of thread next to the fabric; you are only seeing the thread lay against itself. If you find a perfect match, great. Often, you are not that lucky.
If you find two spools that are close, but not perfect, here is a helpful hint about which spool to select. Take into consideration the value (relative lightness or darkness) of your background fabric. If you have a darker background than your appliqué fabric, choose the thread that is slightly darker. If your background fabric is lighter than the appliqué fabric, select the thread that is slightly lighter.
I prefer to use 100% cotton thread, not because I am a purist about fiber content, but because it is easier to thread the thin needles I use. If I find the perfect thread color in a poly-cotton thread, I will use it, but I will change my needle to a size 10 straw needle so the eye is a little larger. I use Aurifil thread (size 50/2), but you can use any brand of thread with a size 60/2, 50/2 or 50/3. Machine embroidery thread is 60/2 and all-purpose sewing thread is 50/3. As with needles, the higher the size of the thread, the thinner the thread.
Silk thread is also an option. I suggest YLI size 100 thread, as it is extremely thin and will disappear along the appliquéd edge. Silk thread is very slippery, however, and may cause some frustration which cotton does not. I suggest YLI size 100 thread, as it is strong enough and is extremely thin, and will disappear along the appliquéd edge. Silk thread acts like a chameleon, and changes its color depending on what is in its surrounding environment as long as the thread is a similar value to the fabric. It is an excellent choice if you are using a multicolored piece of appliqué fabric.
Other Supplies
- straight pins
- Clover 1/4" Bias Tape Maker (do not use any other brand).
- rotary cutter, rotary ruler, rotary cutting mat
- pencil
- empty cardboard roll (such as the core for toilet paper or paper towels)
Ruler I recommend using a 3/16" (5mm) turn under seam allowance in the appliqué that I do, so you may want a ruler so you can see just how much that is. Using too little seam allowance, in my opinion, causes most of the problems with appliqué.
Temporary chalk-like marking pencils (light one for marking on dark fabric and colored one for on light fabric). I have had success with Pat Campbell’s white pencils and Clover’s Water Soluble Pencils (white, blue, pink). You can use any temporary marking tool that you have confidence in. Do not use the markers that disappear over time. You can use any marking tool that you have confidence in. When you read the methods I use for marking the background, you will see that a temporary marking tool makes this all much easier.
Embroidery hoop (I prefer 5", 6" or 7" hoop but any size will work). In Part Three, we will discuss some embellishment techniques, including embroidery.
Embroidery thread In Part Three, I will share two different (very easy) techniques for embroidered stems. If you choose to use one of those two techniques, you will want three different values (shades) of the same color as your stem fabric.
Optional
Throughout the parts, I am going to be introducing you to alternatives for various processes. Below are some supplies that you may want to own if you choose some of those alternatives.
Pattern Transfer Paper. This is a chalk-coated paper that can be used to mark patterns onto dark background fabrics. You might want to wait until you read the first part before you purchase this. If you are using a light background fabric, you will not need this supply at all. Saral©, Chacopy©, and Dritz© are some of the different brands available in stores. On our Web site we provide a Saral product "Pattern Transfer Paper" that is 18" x 24".
Bleached white fabric of good quality and thickness. This will be used as a lining in Part One. It will not be used by everyone.
Lightweight vinyl or lightweight interfacing for overlay method. See how it is used in Part One and make your decision then.
Light box. This is any clear or translucent flat surface that has a light or light source behind it. Examples of light boxes you may already have: window, sliding glass door, glass coffee table, acrylic extension table on sewing machine, piece of glass or plastic laid on an open drawer or laid across the opening in your dining room table when you pull it apart to add an extension leaf. With a lamp or flashlight placed underneath, the light shines through the flat surface so you can see the lines of your pattern when your background fabric is placed on top of it. If you do not already have a light box, do not rush out and purchase one. You may prefer one of my other methods for marking your background fabric.
Nancy carries many of these supplies at Pacific Rim Quilt Company (https://www.pacificrimquilt.com/notions/).
- Choosing a selection results in a full page refresh.
- Opens in a new window.