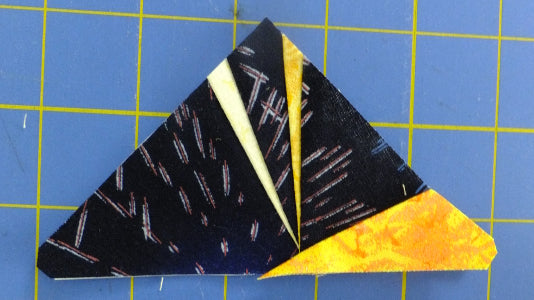
Here's a block for you I designed called Fireworks. This block is foundation pieced so real easy to construct. I made a 6" block, but it could easily be enlarged.

My Fireworks block
To make this block you can download the 6" block foundation template. It contains eight foundations. Sign up to our newsletter and get the templates free! or for a small fee, you can get it the instructions and 4 different sized templates here: Foundation Fireworks Templates
I used a dark navy blue for my background and fairy frost fabrics for the star and star trails.

Fabrics used
Start with foundation labelled A and a piece of background fabric. I cut a 6" square and then cut it through the diagonal. The second half can be used for foundation B.
Trim around foundation A and place it, printed side up on the back of the background fabric triangle. I use a glue stick to dab a spot of glue in the center of the fabric so the foundation stays in place on the fabric. Make sure it is a water soluble glue so that is washes out in water later.

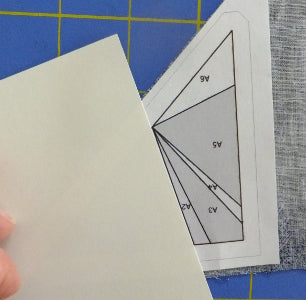
I used an index card to help here, but any piece of card will do. A greeting card works well too. Place the edge of the card along the first seam line. That is the line between sections A1 and A2.

Fold the foundation over the card. Do not fold the fabric.

Place the 1/4" line of your ruler along the fold.

Now trim away the excess so there is a 1/4" seam allowance left beyond the fold.

Align the first color fabric (I used the lightest one) even with the edge just trimmed, right sides of fabric facing each other. For this fabric I cut a 1" strip. You require about 4" in length. Note: The great thing about foundation piecing is, you do not need to cut accurately.
Once lined up evenly, sew the first seam.

Turn over to the right side and press the yellow fabric over the foundation. This is important. Make sure you press well.

Now it is time to repeat the process. Turn back to the foundation side. Use the card to fold the seam line between sections A2 and A3, then trim leaving a 1/4" seam allowance.

Align another background section, right sides together along trimmed edge and sew along the seam line.

Press in place. Continue until you have added all the pieces. I used another 1" strip for the next yellow, this time cutting 3" sections. I used a 2" x 3" section for the main center star section (A6).

The right side looks like this.

It looks much better when trimmed.

Foundation B is the opposite side of this first quarter, but it is worked in the same way. Once complete, the two sections can be joined to make the first quarter. Do NOT remove the paper yet. Press toward foundation B which is away from the bulky seams in foundation A.

The great thing about this block is I designed it so there were no matching seams at this point. They only matching that will be done is when the four quarters are joined.

What do you think?
Remember to grab the templates simply sign up to our newsletter and get the templates free or for a small fee, you can get it the instructions and 4 different sized templates here: Foundation Templates


10 comments
Evelyn, click the link in the blog post or copy and paste this link in your browser: https://arbeedesigns.com/products/foundation-fireworks
How can I get the fireworks template
Sorry Galey, I don’t speak French? only English. If you are looking for the pattern you can find it here: https://arbeedesigns.com/products/foundation-fireworks
Je n arrive pas savoir le patron des étoiles. Trop beau et interressant à faire
I love this block! Looking forward to the templates!