A friend gave me some Sulky Puffy Foam that she didn't want so I thought I'd give it a try. I figured this might make some interesting embellishments for Anita's ebook Celebrations or my Stitch Along challenges.

I decided I would make a soccer ball - nothing like diving right in!
I started out by drawing a template and cutting two 3 1/2" squares, one white and one black from the foam. I also used a scrap of white fabric to stitch onto.

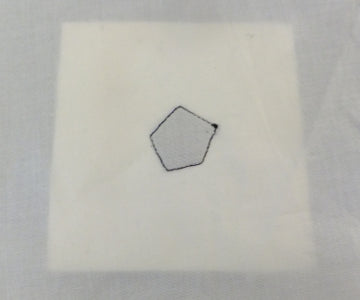
On the center of the black square I draw the center hexagon. Then I placed it on the fabric and stitched exactly on top of the hexagon lines being careful to stop right on the point to pivot. (I lighted the black up so you could see the stitching - I should have used white thread instead)

With the aid of my thumbnail, I removed the excess black foam by pressing along the seam line...

...until I was left with just the black hexagon on the fabric.

If I'd wanted, I could have used a separate small piece of black for this hexagon, but I found there was plenty of room to work within this large piece and still have plenty for the outside round.
Next I centered the white square over the black hexagon, flipped it all over to the fabric side and stitch exactly on the hexagon stitching line. (you can see the white square underneath)

I flipped it over again and removed the white inner section being careful not to lift the black at the same time.

It was a little tricky getting started, but once I did, the foam came away easily. It just tears along the stitching line. Now I have a white square with a black hexagon.

I placed my template on top of the white square lining up the hexagon, then I used a sharp pencil to draw along the lines. With enough pressure, this makes an indent in the foam so I can see the lines to stitch.

I removed the template and darkened the lines so I could see them easily.

Then I stitched around the outer edge only...

... and removed the excess foam.

Now back on the fabric side, with the black square aligned underneath, I stitched that line again.

I removed the inner black section. This is how it looks on the front now.

Once again I aligned the template but instead of using the pencil, I stitch around the outer edge directly on the template. This made a much nicer round as a soccer ball should be.

I ripped off the template, removed the excess black foam and drew in the remaining lines on the black with my grey quilter pencil. Then I selected a tiny zigzag stitch and with white thread I stitch along all the lines except the outside edge.

Right about here, I realized something was wrong. Can you spot it? It doesn't quite look like a soccer ball does it? I had removed too much white and had too much black left, but it was an easy fix. I just did the same procedure again. I started by removing the black that shouldn't be there and replaced it with white.

Now there's a soccer ball. It's pretty cool to touch too. When I go to use it as an embellishment, I will most likely trim back the fabric close to the foam and then use the same tiny zigzag to stitch it in place. Actually, I'll probably increase the zigzag width just a tad.
This is a cool way to make embellishments for quilts, but there are many other ways to add embellishments too. Anita's Celebration ebook includes other tutorials and describes how to display them. Be sure to check it out: Celebrations


